Electrical wires bring light and power to the places where we live. When properly installed, they ensure homes are safe and function as needed.
Choosing the right electric wire starts with understanding how to read wire labels. The label tells you about the type, size, and insulation of the conductors inside. However, if you want some professional assistance, you can call Chester County Electricians.
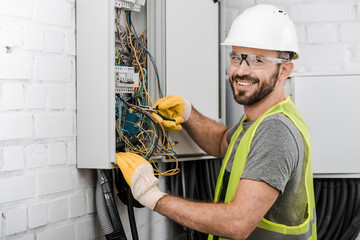
Electrical wiring is the process of connecting cables and wires associated with electricity in a structured way to ensure a continuous power supply. It involves fuses, switches, socket outlets, and lights. Electrical wiring is a vital add-on to a house, office, or commercial space, and there are various important factors to consider when installing it.
Firstly, it is important to understand the different stages of an electrical installation. The first stage is the design phase. This is when the electrical layout is drawn up and plans are put into place. It is important to get this right, as any mistakes made during this phase can be costly or even dangerous.
Once the electrical diagram has been drawn up, it is time to start laying down the actual wires. There are several different types of wire, and it is important to choose the correct one for each job. The type of wire will depend on the voltage and current capability needed. The size of the wire will also impact its strength and durability. It is important to remember that any exposed wires should be protected from physical damage, moisture, and corrosion.
There are several different options for wiring, including using conduit and bare metal wiring. Conduit wiring is usually the safest option, as it protects the wires from water and other contaminants. It is also easy to repair, and it will look more professional than bare metal wiring. However, it is more expensive than other methods of wiring.
For smaller jobs, a simple system of plastic-insulated wires can be used. This system is not ideal for residential use, but it is perfect for building sites. It is quick and easy to work with, and it requires less space than other methods of wiring.
It is also important to make sure that any wires are kept away from sharp corners and tight walls. This will prevent any accidental contact, which could lead to a fire or other serious injury. In addition, any wire that is not in an electrical junction box should be secured with a clamp to prevent it from becoming frayed or cut.
Switches
Your home’s switches control everything from lights to appliances. Whether you’re upgrading to newer switches or replacing old ones, it’s important to know the different types of switch wiring to keep your family safe and your work completed correctly.
Begin by turning off the power at your circuit breaker for the room where you’re working. While wearing rubber electrical gloves, remove the switch cover and use a non-contact or probe-type voltage tester to verify that there is no current coming into or out of the box. If the tester signals any current, turn off the breaker in that room and have an electrician take a look at it before moving forward.
Once the power is off, loosen the terminal screws on the side of the switch box and pull it out. Examine the switches for any wires attached to them and make note of their color and shape. For example, single-pole switches will have two brass terminals, while double-pole switches will have four.
You’ll also want to make sure the switch is rated for the amount of power it will need to handle. Light switches, for instance, are typically rated at 120 volts and 15 amps.
After inspecting the switches, disconnect all the wires by loosening each of their terminal screws with a screwdriver. If there are any wires connected to the switches that are covered in a wire nut, carefully twist the nut off, making sure not to loosen the attached hook-shaped ends of the wires. Once the connections are removed, you’ll need to identify the black (hot) and white (neutral) wires.
Connect the black wires to their respective terminal screws on the new switch, being careful not to cross them. Then attach the white traveler conductors to the two terminal screws that are the same color, which should be on the right side of the switch. If there’s a green wire, attach it to the switch’s green terminal screw. If you’re installing a four-way switch, be careful to connect the white traveler wires to their respective terminals on both the left and right sides of the switch.
Outlets
Electrical outlets (also known as receptacles) connect to power lines and serve as sockets where plug-in electrical devices like lights, appliances, and other home equipment are placed. In addition to providing convenience, electrical outlets also help protect your household appliances from power surges and keep electricity flowing safely throughout your house or business.
Many homeowners need to replace outlets for one of two reasons: their current outlets are having issues, or they want to add more outlets to a room. Replacing an outlet is a relatively simple process, but it’s important to follow the proper safety steps in order to avoid potential hazards.
Before you begin, make sure that the power to the outlet you are planning to replace is shut off. You can do this by going to your home’s electrical panel and toggling the switch associated with the circuit that sends power to that outlet. If you are unsure whether the switch is off, use a voltage tester to double-check. If you find that the voltage tester’s probes are unable to connect with either of the outlet’s slots, then the switch is off and it’s safe to continue working.
After shutting off the power, remove the outlet’s faceplate and unscrew the mounting screws that hold it in place in the electrical box. Once the outlet is removed, locate studs near where you are planning to install the new outlet and measure the distance between the locations. You’ll need this information later to determine how much wire to cut for your new outlet.
Once you have the appropriate amount of cable cut, strip the sheathing back a couple of inches and then tuck it in behind your new outlet. If you’re adding a ground-fault circuit interrupter (GFCI) outlet, be sure to install it with the grounding pin on top, which will ensure that if something metal falls on your outlet and contacts the hot and neutral wires, a direct short isn’t possible.
Carefully maneuver the wires into your new outlet and screw the outlet in place in the electrical box, tightening the screws at the top and bottom of the outlet. Reconnect the power to the breaker box and flip it on. Turn on a light and test the outlet to make sure that it works properly.
Lights
Lighting is one of the first things homeowners install in a new home. After the switchboards and receptacles are up and running, lights, fans, and any other electrical equipment can be added. It’s not a task that should be taken lightly since it involves electricity, and mistakes can lead to injury or death. But, with a little care and a few tips, most DIYers can safely and easily wire a light fixture.
Before starting, turn off the power to the junction box containing your light. Then, clean the junction box and work area of any dust or cobwebs to make it easier to remove the old fixture. Also, be sure to wear rubber gloves and safety goggles. A circuit tester may come in handy, too. It can tell you if any wires have become disconnected or damaged, and it will help you avoid making dangerous wiring errors.
When installing a new light fixture, follow the directions that came with it. It should list the type of bracket it needs, and most hardware stores will carry this kind of item. The directions will also include information about how to connect it to the junction box. It’s important to consult this information before beginning work because different types of light fixtures require different methods of attachment. For example, some light fixtures have screw holes that must line up with the mounting bracket’s screws. Others have a special connector that attaches to a screw on the junction box’s mounting plate.
Wires that contain lighting circuits usually have three conductors, called phases, neutrals, and grounding wires. These conductors start at the main distribution panel and reach each luminaire. They’re identified by their color, with white or black wires attached to each fixture and the grounding wire extending to the chassis of the light fixture (or another metal surface) to disperse excess electrical energy.
It’s important that all of the conductors are properly connected in order for the fixture to work. The hot wires should be insulated to prevent heat from causing a fire. The neutral and grounding wires should be capped with plastic caps, or “wiring nuts.”